Setting up Exchange Email in Outlook Classic
Important Compatibility Note
This guide is for Outlook Classic only.
The "New Outlook" (Windows Mail replacement) requires OAuth2 (Modern Authentication). IONOS Hosted Exchange utilizes Basic Authentication, which is not supported by the New Outlook app. You must toggle back to "Classic Outlook" to set up this account.
Prerequisites: DNS Configuration
Before attempting setup, ensure your domain's Autodiscover record is pointing to the Exchange 2019 server. If not configured, add the following CNAME record and allow 1-4 hours for propagation.
autodiscover.exchange2019.ionos.com
Step 1 Advanced Setup
Open Outlook Classic. When prompted to add an account, enter your email address, but do not click Connect yet.
- Click Advanced Options.
- Check the box: "Let me set up my account manually".
- Click Connect.

Tick "Let me set up my account manually"
Step 2 Select Service Type
Outlook will present several icons. You must select the legacy Exchange option to ensure Basic Auth is used.
Select: Exchange 2013 or earlier.

Step 3 Autodiscover Prompt
A pop-up may appear asking permission to configure settings for autodiscover.exchange2019.ionos.com.
- Check "Don't ask me about this website again".
- Click Allow.

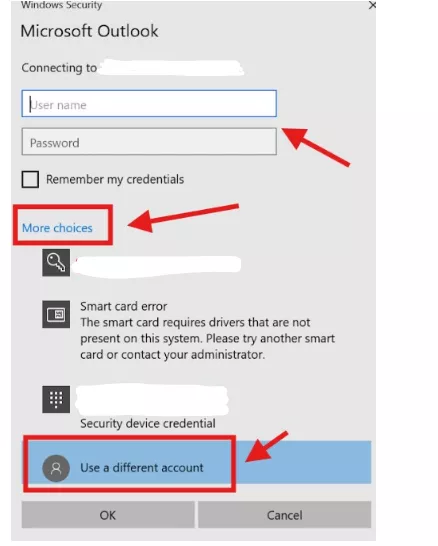
Step 4 Windows Security Authentication
A Windows Security prompt will appear. It often defaults to your local computer's username, which is incorrect. You must specify the Exchange account credentials.
- Click on More Choices (or "Use another account").
- Select the option to type a new credential.
- Username: Enter your full Exchange email address (e.g.,
john@example.com). - Password: Enter your Exchange email password.
- Check "Remember my credentials" and click OK.
Success Setup Complete
Outlook will confirm the account is successfully added. You may need to restart Outlook for all folders to sync completely.
